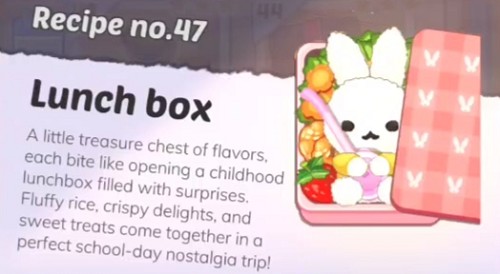
Cookingdom Level 47: Lunch Box - Walkthrough & Guide
Welcome to Cookingdom Level 47, where your culinary skills will be put to the test in creating an adorable and delicious "Lunch Box"! This level, titled Recipe no. 47, is all about assembling a multi-component bento box that’s a "little treasure chest of flavors." Success hinges on careful preparation of each ingredient, precise cooking for items like tamagoyaki and stir-fry, and artful assembly to create a visually appealing and balanced meal. Unlike some fast-paced levels, this stage rewards attention to detail and following the sequence of tasks. Prepare for a delightful journey into crafting a nostalgic school-day treat!
Step 1: Initial Ingredient Processing - Garlic and Edamame - Cookingdom Level 47
The first phase of creating your lunch box involves preparing some of the key aromatic and vegetable components.
Garlic Preparation:
- Locate the whole garlic bulb, typically found in the bottom row of your ingredient tray.
- Drag the garlic bulb onto the central wooden cutting board.
- Tap the garlic bulb on the cutting board. This action will cause it to break apart into individual cloves.
- Next, find the kitchen knife icon (usually positioned near the cutting board). Drag the knife over to the separated garlic cloves.
- The knife will animate, finely chopping the garlic.
- Once chopped, drag the minced garlic from the cutting board to one of the empty square ingredient plates/containers, usually to the right, to keep it ready for later use.
Edamame Preparation:
- Identify the pile of green edamame pods, also typically in your ingredient tray.
- Drag the edamame pods onto the cutting board.
- Tap repeatedly on the edamame pods. With each tap, beans will pop out from the pods. Continue tapping until all pods are shelled. The empty pods may disappear or be moved aside.
- Drag the shelled edamame beans from the cutting board to another empty square ingredient plate/container.
Step 2: Preparing the Strawberries - Cookingdom Level 47
Next, you'll prepare the sweet fruit component for the lunch box.
- Select the bunch of fresh strawberries from your ingredient tray.
- Drag the strawberries onto the cutting board.
- You will notice each strawberry has a green leafy stem (calyx). To prepare them, you must remove these stems.
- Individually drag each green stem from the strawberries towards the sink area (or a designated discard zone, often depicted near the sink). The stem will disappear, indicating it has been removed.
- Repeat this process for all the strawberries on the cutting board until all are de-stemmed.
- Once all strawberries are stem-free, drag the cleaned strawberries from the cutting board to a fresh, empty square ingredient plate/container.
Step 3: Washing Key Ingredients - Carrots, Shrimp, and Greens - Cookingdom Level 47
Proper hygiene is important! Several ingredients need a good wash before further preparation.
- Locate a large metal pot or bowl, often found near the bottom of the screen or to the side. Drag this pot and place it directly under the kitchen sink faucet.
- Tap on the faucet handle to turn on the water. The pot will begin to fill with water. Wait until it's adequately full (usually indicated by the water stopping or a visual cue).
- From your ingredient tray, drag the raw shrimp and place them into the water-filled pot.
- Next, drag the bunch of greens (these appear to be a leafy vegetable like bok choy or similar) into the pot with the shrimp.
- Finally, drag the carrots into the same pot of water.
- Allow the ingredients to wash. You'll typically see a bubbling animation or a short timer indicating the washing process.
- Once the washing is complete, tap the faucet handle again to turn off the water. The ingredients are now clean and ready for the next steps.
Step 4: Chopping and Preparing Washed Items - Cookingdom Level 47
With the ingredients washed, it's time to process them further.
Carrot Preparation:
- Drag the washed carrots from the pot and place them onto the cutting board.
- Drag the kitchen knife icon to the carrots. The animation will show the green tops being sliced off first.
- The knife will then proceed to slice the carrots into rounds or similar pieces suitable for stir-frying or as a bento component.
- Drag the chopped/sliced carrots from the cutting board to an empty square ingredient plate/container.
Shrimp Preparation:
- Drag the washed shrimp from the pot onto the cutting board.
- Drag the kitchen knife icon to the shrimp. The animation here usually represents deveining and possibly shelling the shrimp to prepare them for cooking.
- Once the shrimp are prepared, drag them from the cutting board to another empty square ingredient plate/container.
Greens Preparation:
- Drag the washed greens from the pot onto the cutting board.
- For this particular step in the video, there doesn't appear to be a cutting animation for the greens after they are placed on the board.
- Simply drag the prepared (washed) greens from the cutting board to a final empty square ingredient plate/container.
Step 5: Creating the Tamagoyaki Egg Mixture - Cookingdom Level 47
One of the star components of a Japanese-style bento is Tamagoyaki (rolled omelette). This step focuses on preparing the egg batter.
- You'll be presented with a new set of ingredients: a carton of eggs, mayonnaise, soy sauce, bowls of sugar and salt, a mixing bowl, a whisk, and a spoon.
- Drag three individual eggs from the carton to the large mixing bowl. Each egg will crack as it's added.
- Drag the bottle of mayonnaise and pour a portion into the mixing bowl with the eggs.
- Drag the bottle of soy sauce and add some to the egg mixture.
- Take the spoon utensil. Drag it first to the bowl of sugar to pick some up, then drag the spoon (now with sugar) to the mixing bowl to add the sugar.
- Repeat the process with the salt: drag the spoon to the bowl of salt, then drag the spoon (with salt) to the mixing bowl.
- Finally, drag the whisk into the mixing bowl.
- A mini-game or progress bar will appear. Whisk the mixture by making circular motions with your cursor/finger over the whisk or by tapping/holding as indicated, until the green progress bar is completely filled. This ensures the egg mixture is well combined.
Step 6: Cooking the Savory Stir-Fry - Cookingdom Level 47
Now it's time to cook one of the main savory dishes for the lunch box.
- This scene features a portable stove with a frying pan, your prepared ingredients (edamame, carrots, shrimp, garlic), a bowl of uncooked rice, and oil.
- Drag the oil bottle to the frying pan to add oil.
- Tap the power button on the portable stove to turn it on and heat the pan.
- From their respective plates, drag the prepared edamame beans into the hot pan.
- Next, add the prepared sliced carrots to the pan.
- Then, add the prepared shrimp to the pan.
- Follow with the prepared chopped garlic into the pan.
- Using the spoon provided, scoop uncooked rice from its bowl and add it to the pan with the other ingredients.
- A cooking/stirring animation will begin, often accompanied by a progress bar or timer. Allow the ingredients to cook thoroughly until the indicator shows completion.
- Once cooked, tap the power button on the stove to turn it off.
- Using the spatula tool, drag the entire cooked stir-fry mixture (rice, vegetables, shrimp, and garlic) from the pan to one of the empty grey rectangular serving/holding plates at the bottom of the screen.
Step 7: Cooking the Tamagoyaki (Rolled Omelette) - Cookingdom Level 47
With the stir-fry done, the pan is now ready for the Tamagoyaki.
- Ensure the pan on the stove is clear. (The game usually handles this automatically).
- Drag the bowl containing the whisked egg mixture (prepared in Step 5) and pour it into the frying pan.
- Tap the power button on the portable stove to turn it on.
- The egg will begin to cook. You'll typically see an animation of the egg being rolled or folded multiple times to create the characteristic layered Tamagoyaki. A progress bar will indicate the cooking time.
- Once the Tamagoyaki is fully cooked (progress bar filled), tap the power button on the stove to turn it off.
- Using the spatula tool, carefully transfer the cooked Tamagoyaki rolls from the pan to a second empty grey rectangular serving/holding plate. It will usually be pre-sliced into neat rolls.
Step 8: Isolating Cooked Shrimp for the Bento - Cookingdom Level 47
This step ensures you have a separate portion of shrimp for distinct placement in the bento.
- After the Tamagoyaki has been removed, the video shows the (presumably) same pan, still hot, being used.
- Using the spatula, cooked shrimp are then moved from this pan area to a third empty grey rectangular serving/holding plate.
- This action designates these shrimp as a standalone component for the lunch box, separate from those integrated into the stir-fry, even if they originated from the same initial batch.
Step 9: Preparing the Rice - Cookingdom Level 47
A bento isn't complete without perfectly cooked rice, which will form the base for the adorable bunny centerpiece.
- You'll now focus on the rice cooker. Ingredients present are a bag of uncooked rice, a water jug, and a rice scoop.
- Drag the rice scoop to the bag of rice to pick up a portion. Then, drag the scoop (with rice) to the inner bowl of the rice cooker.
- Repeat this scooping process two or three times, or until the rice cooker bowl appears adequately filled with uncooked rice.
- Next, drag the water jug and pour water into the rice cooker bowl, over the rice.
- Close the lid of the rice cooker.
- Tap the power button on the rice cooker to begin the cooking cycle.
- A timer or progress bar will show the rice cooking. Wait until it indicates that the rice is fully cooked.
Step 10: Shaping the Rice for the Bento - Cookingdom Level 47
Once the rice is cooked, it needs to be shaped for the bento presentation.
- The rice cooker lid will open automatically, revealing the fluffy cooked rice.
- Drag the rice scoop into the rice cooker to pick up a large portion of cooked rice.
- Transfer this scoop of rice onto the wooden cutting board. It will form a large pile.
- Tap repeatedly on the pile of rice on the cutting board. With each tap, the rice will begin to be molded and separated into specific shapes: one larger main portion (for the bunny's body/head) and four smaller, somewhat oval portions (for ears and paws).
- Once all five rice portions are shaped, drag each one from the cutting board to the long grey tray located at the bottom of the screen. This tray will hold your shaped rice ready for assembly.
Step 11: Assembling the Lunch Box - Main Savory Items - Cookingdom Level 47
It's time to start filling the lunch box with the delicious components you've prepared!
- A pink, compartmentalized bento box will appear.
- Locate the plate holding the savory stir-fry mixture (rice, vegetables, shrimp, garlic). Drag this entire mixture and place it into one of the larger compartments of the bento box.
- Next, take the plate with the separately cooked shrimp (from Step 8). Arrange these shrimp neatly within the same compartment as the stir-fry, or in an adjacent section if space allows and the game guides you.
- Find the plate with the cooked Tamagoyaki rolls. Drag these rolls and place them into another distinct section or compartment of the bento box.
Step 12: Adding Fruits and Greens to the Bento - Cookingdom Level 47
Balancing the savory items with fresh produce is key to a good bento.
- Take the plate of prepared (de-stemmed) strawberries. Drag them and arrange them in one of the smaller compartments of the bento box, or alongside other items.
- Locate the plate with the prepared greens (lettuce/bok choy). Drag these greens and use them to line a compartment, act as a divider, or fill another small section, adding a touch of freshness and color.
Step 13: Crafting the Rice Bunny Centerpiece - Cookingdom Level 47
The highlight of this bento is an adorable rice bunny.
- From the tray holding your shaped rice portions, drag the largest rice portion and place it in a prominent central area of the bento box, typically on top of some of the greens or in its own dedicated space. This will form the bunny's head and body.
- Select two of the smaller, oval-shaped rice portions. Drag them and position them on top of the large rice portion to create the bunny's ears.
- Take the remaining two small rice portions. Drag these and place them on the sides or front of the large rice portion to represent the bunny's paws or hands.
- Once the rice components are in place, the game will typically automatically add small details like eyes and a nose (often made from seaweed or other small garnishes) to complete the bunny's face.
Step 14: Final Bento Garnish and Completion - Cookingdom Level 47
A few final touches will perfect your lunch box masterpiece.
- You should have a small, yellow, bar-shaped ingredient remaining – this is likely a piece of pickled radish (takuan) or a similar garnish. Drag this yellow strip and place it artfully in the bento box, perhaps next to the rice bunny or alongside the Tamagoyaki, for an extra pop of color and flavor.
- With all components beautifully arranged, drag the patterned lid of the bento box and place it on top to close it.
- The scene will transition, often showing the bento box being presented or enjoyed, followed by a "Taste explosion!" message and your star rating for the level.
Congratulations! You've successfully navigated Cookingdom Level 47 and created a delightful and intricate Lunch Box.
Notes and Precautions for Cookingdom Level 47
- Order of Operations: The sequence of preparation and cooking is critical. Adding ingredients out of order, especially during cooking phases, can lead to failure.
- Ingredient Placement: Pay close attention to where each prepared or cooked item is moved. Using the correct temporary holding plates/trays is important before the final assembly.
- Tool Usage: Ensure you use the correct tool for each task – knife for chopping, whisk for eggs, spatula for transferring cooked food, scoop for rice.
- Mini-Games and Timers: Be prepared for interactive elements like the whisking progress bar and cooking timers. Complete these accurately.
- Visual Cues: The game provides strong visual cues for most actions. Watch for highlights, animations, and changes in ingredient appearance.
- Ambiguous Steps: The separation of shrimp (Step 8) might feel a little abstract as it's not explicitly shown as a separate cooking batch from raw. Trust the game's visual guidance for moving components.
Tips and Tricks for Cookingdom Level 47
- Observe First: If you're stuck or unsure, re-watch the video or any in-game demonstration carefully to understand the flow.
- One Task at a Time: Focus on completing each individual action (e.g., fully chopping one vegetable, fully cooking one dish) before moving to the next. Don't rush.
- Familiarize Yourself: Before starting, take a moment to identify all the raw ingredients and tools on screen so you can quickly locate them when needed.
- Clear Workspace Logic: Although you don't manually clear the workspace, understand that items are moved to make space or to group them logically for the next phase.
- Bento Aesthetics: While the game guides the placement, think about how a real bento is assembled – with clear separation of components and an appealing arrangement. This might help in anticipating placements.